In Wix API, you can increase or decrease inventory by using Postman. Instead of wasting a lot of time manually changing each variant’s inventory, you can do it quickly by using Wix API.
Now, let’s dive into this subject a little deeper to know how to increase or decrease inventory using Postman in Wix API.
If this is the first time you make a call in the Postman, you must generate API credentials from the Wix Developers website.
Step 1: Generate API credentials from the Wix Developers’ Website
Follow the process in Wix API: How to get an access token and refresh the access token? To know how to access Wix API.
- After creating an app, remember the access token and the refresh token to send requests in the Postman.
Step 2: Refresh the access token using Postman
Wix’s access token is only valid for 5 minutes, so you need to use the refresh token to request a new access token.
Flowing the steps below for refreshing the access token.
- Log in to your Postman and create a new workspace.
- Create a new POST with this URL:
https://www.wix.com/oauth/access
- In the body section, enter the code.
Payload:
{
    "grant_type": "refresh_token",
    "client_id": <APP_ID>,
    "client_secret": <APP_SECRET>,
    "refresh_token": <REFRESH_TOKEN>
}

Body Params:
| NAME | TYPE | DESCRIPTION |
| grant_type | string | Value must be set to “refresh_token” |
| client_id | string | The App ID as defined in the Wix Developers Center |
| client_secret | string | The Secret Key for your app as defined in your Wix Developers Center |
| refresh_token | string | The refresh token issued with the access token |
- Then click SEND
Response:
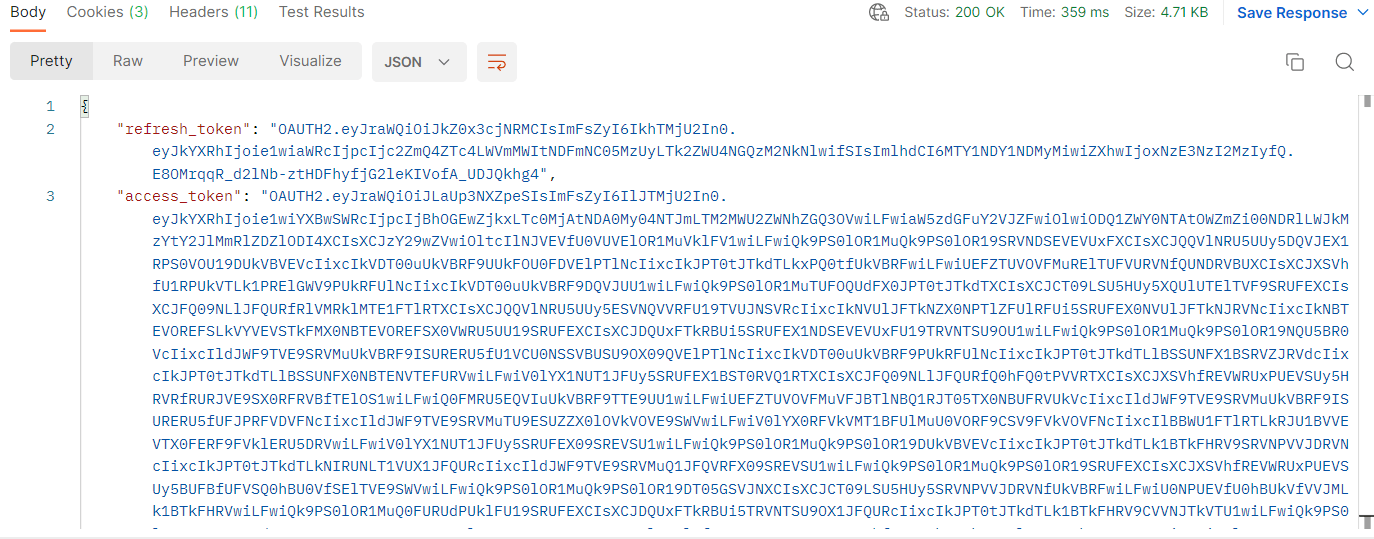
The Postman will return the new access token and the refresh token in order to request a new access token.
Step 3: Get the Product ID and the Variant ID
Product ID
The next call includes the product ID, so you need to get that parameter first.
- From the Wix dashboard
- Go to “Store products”
- and choose “Products”
- Click on a product that you want to see
- Copy the product ID in the URL.
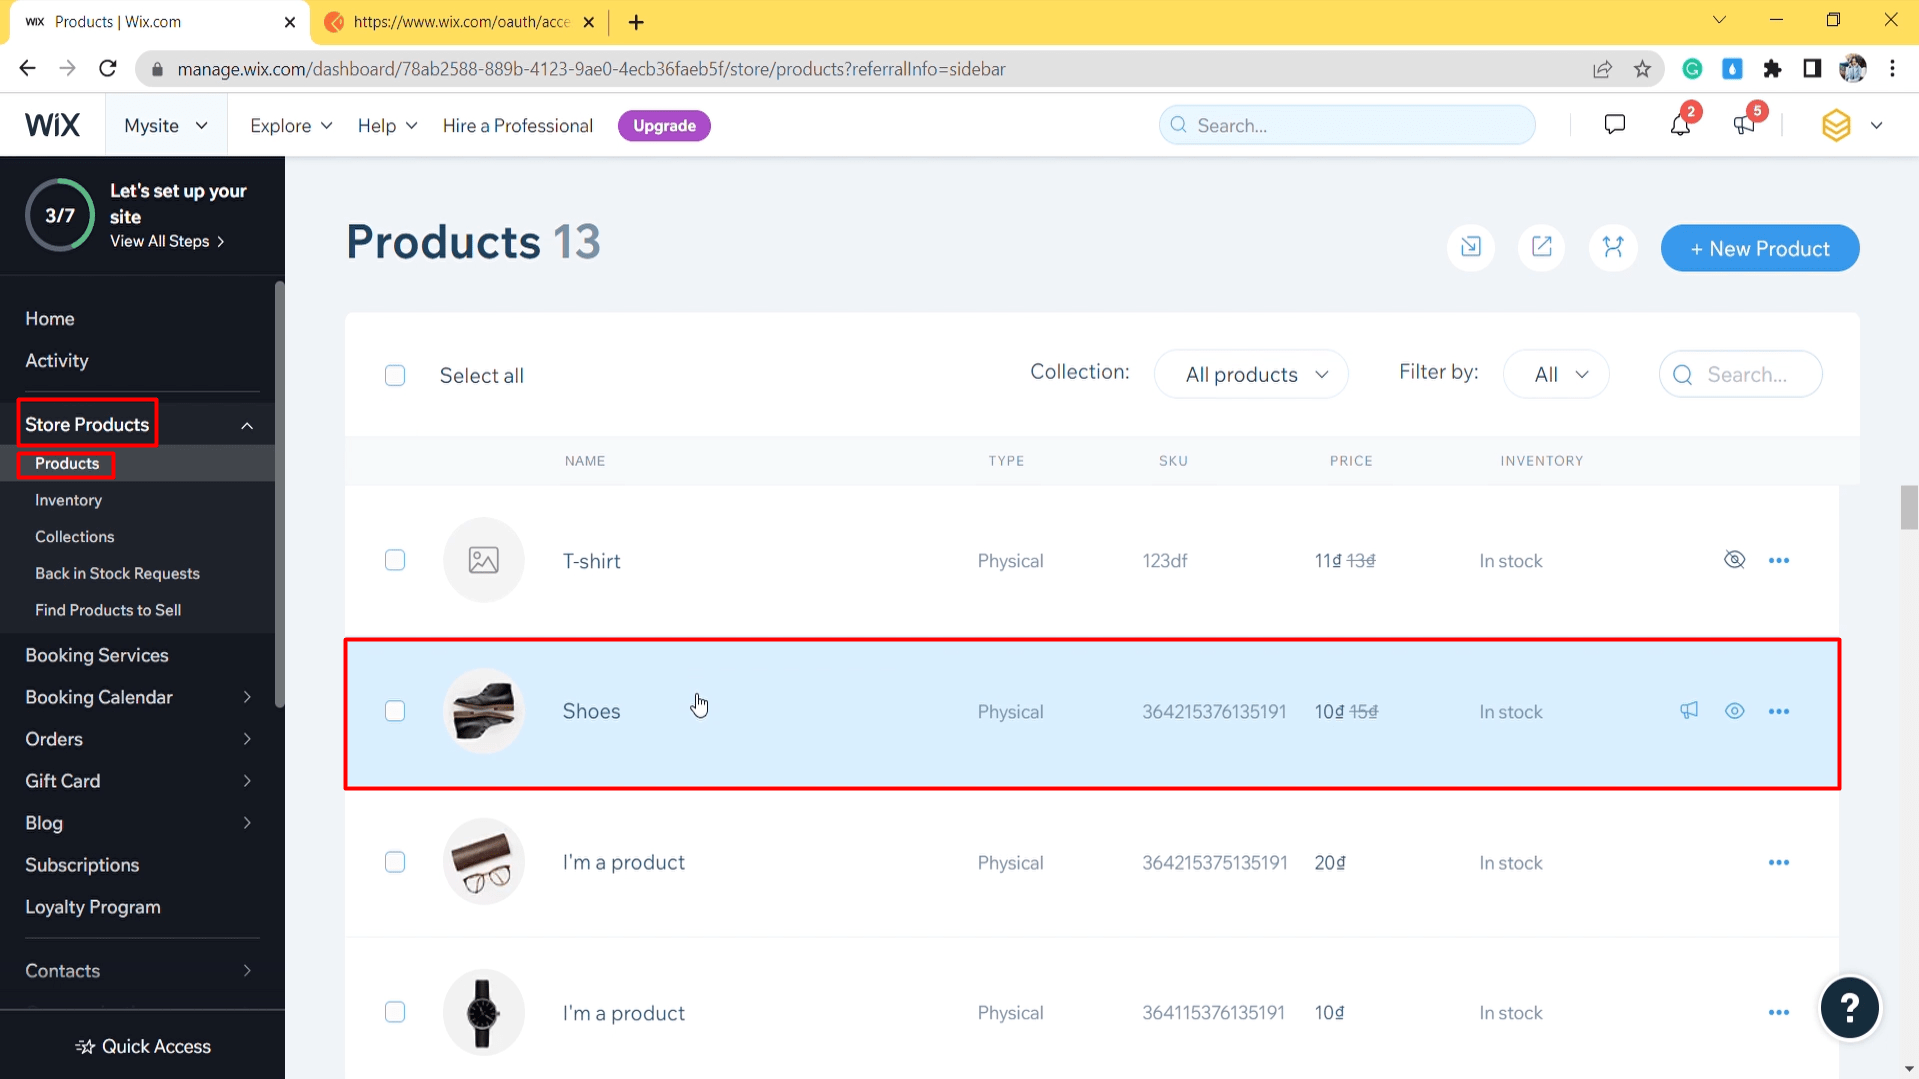
Product ID = df19c1f7-07d8-a265-42f8-e8dfa824cc6e
Variant ID
Besides, Beehexa will show you the product variant information and the inventory of that variant so you can see the inventory change in step 4.
- Scroll down to the “Manage variants” section
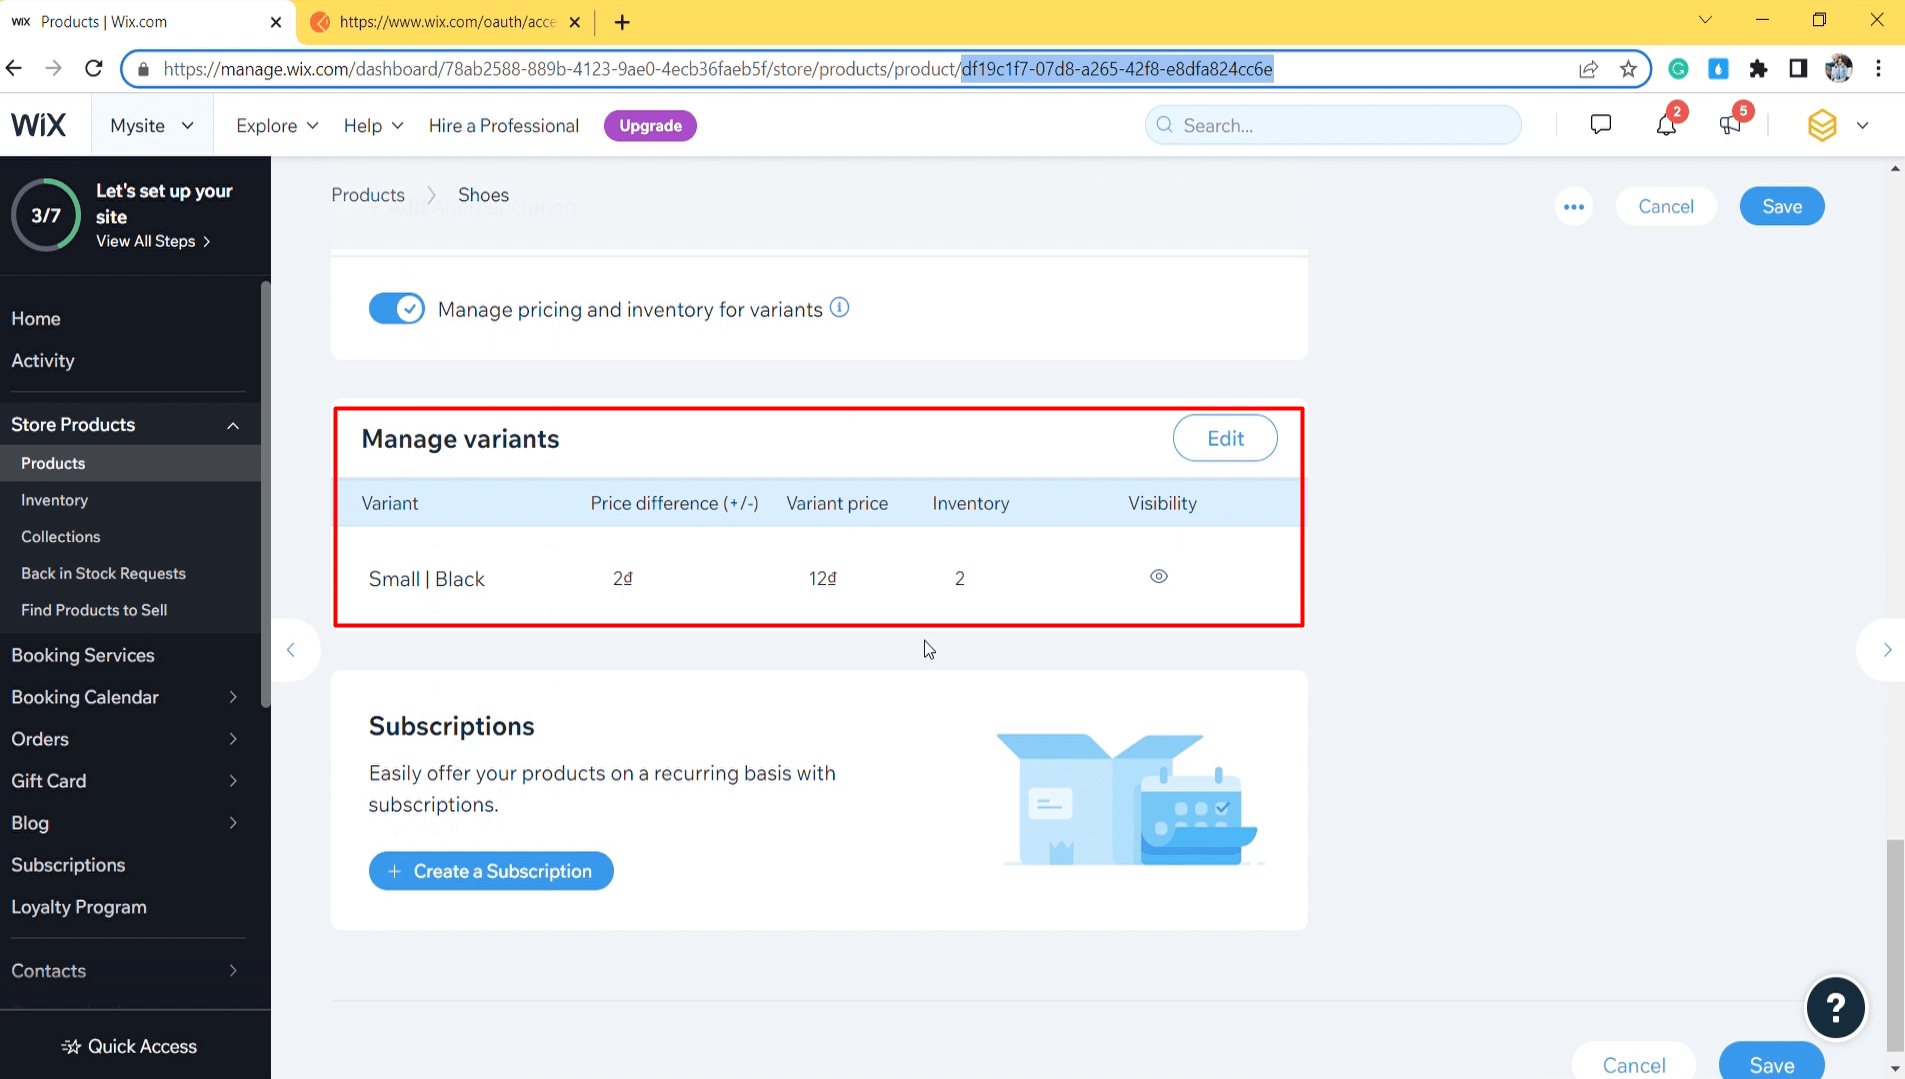
As you can see, the variant we will get the ID is Small Black, with 2 product variants in stock.
Variants are combinations of product options.
Before increasing the variant’s inventory, you need to get the variant_ID. Because the next call includes that parameter. The variant ID doesn’t show in the dashboard or Wix store. To get the variant ID, you need to use API.
Now we will get the Variant ID.
- Log in to your Postman and create a new workspace.
- Create a new POST with this URL:
https://www.wixapis.com/stores/v1/products/{id}/variants/query{id} = Product ID.
-HEADER: ‘Authorization: <ACCESS TOKEN>’
In this call, you must ensure that you are granted permission to read the products.

In the body, enter the code.
Payload:
{
    "choices": {
        "Black Shoes": "Black"
    },
    "includeMerchantSpecificData": true
}
“Black Shoes”: “Black” –> Option-choice key-value pairs

Click send
Response:
As you can see, the Postman returned the variant information like this.
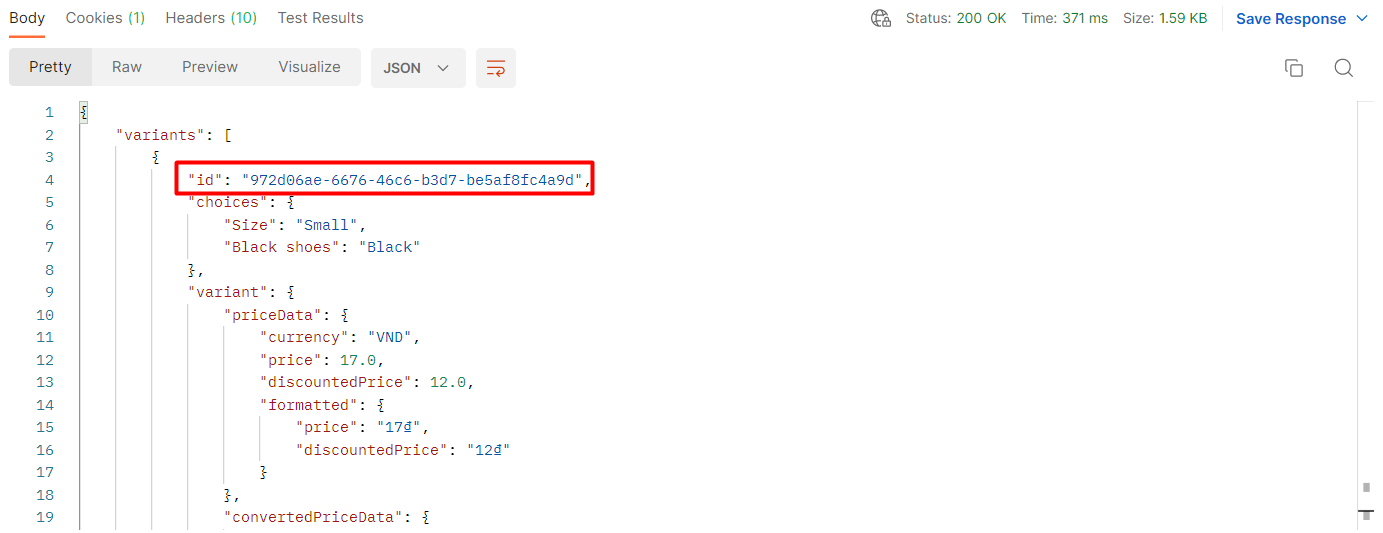
Copy the variant ID to use in the next call.
Variant ID = 972d06ae-6676-46c6-b3d7-be5af8fc4a9d
Step 4: Increase inventory using Postman
Now, we are ready to increase inventory.
- Log in to your Postman and create a new workspace.
- Create a new POST with this URL:
https://www.wixapis.com/stores/v2/inventoryItems/increment
-HEADER: ‘Authorization: <ACCESS TOKEN>’
In the body section, enter the code.
Payload:
{
    "incrementData": [{
        "productId": "<PRODUCT_ID>",
        "variantId": “<VARIANT_ID>”,
        "incrementBy": 10
    }]
}
Then click SEND
Response:
The Postman returned the empty array. It means the quantity of the variant has been increased.

Step 5: Verify the result
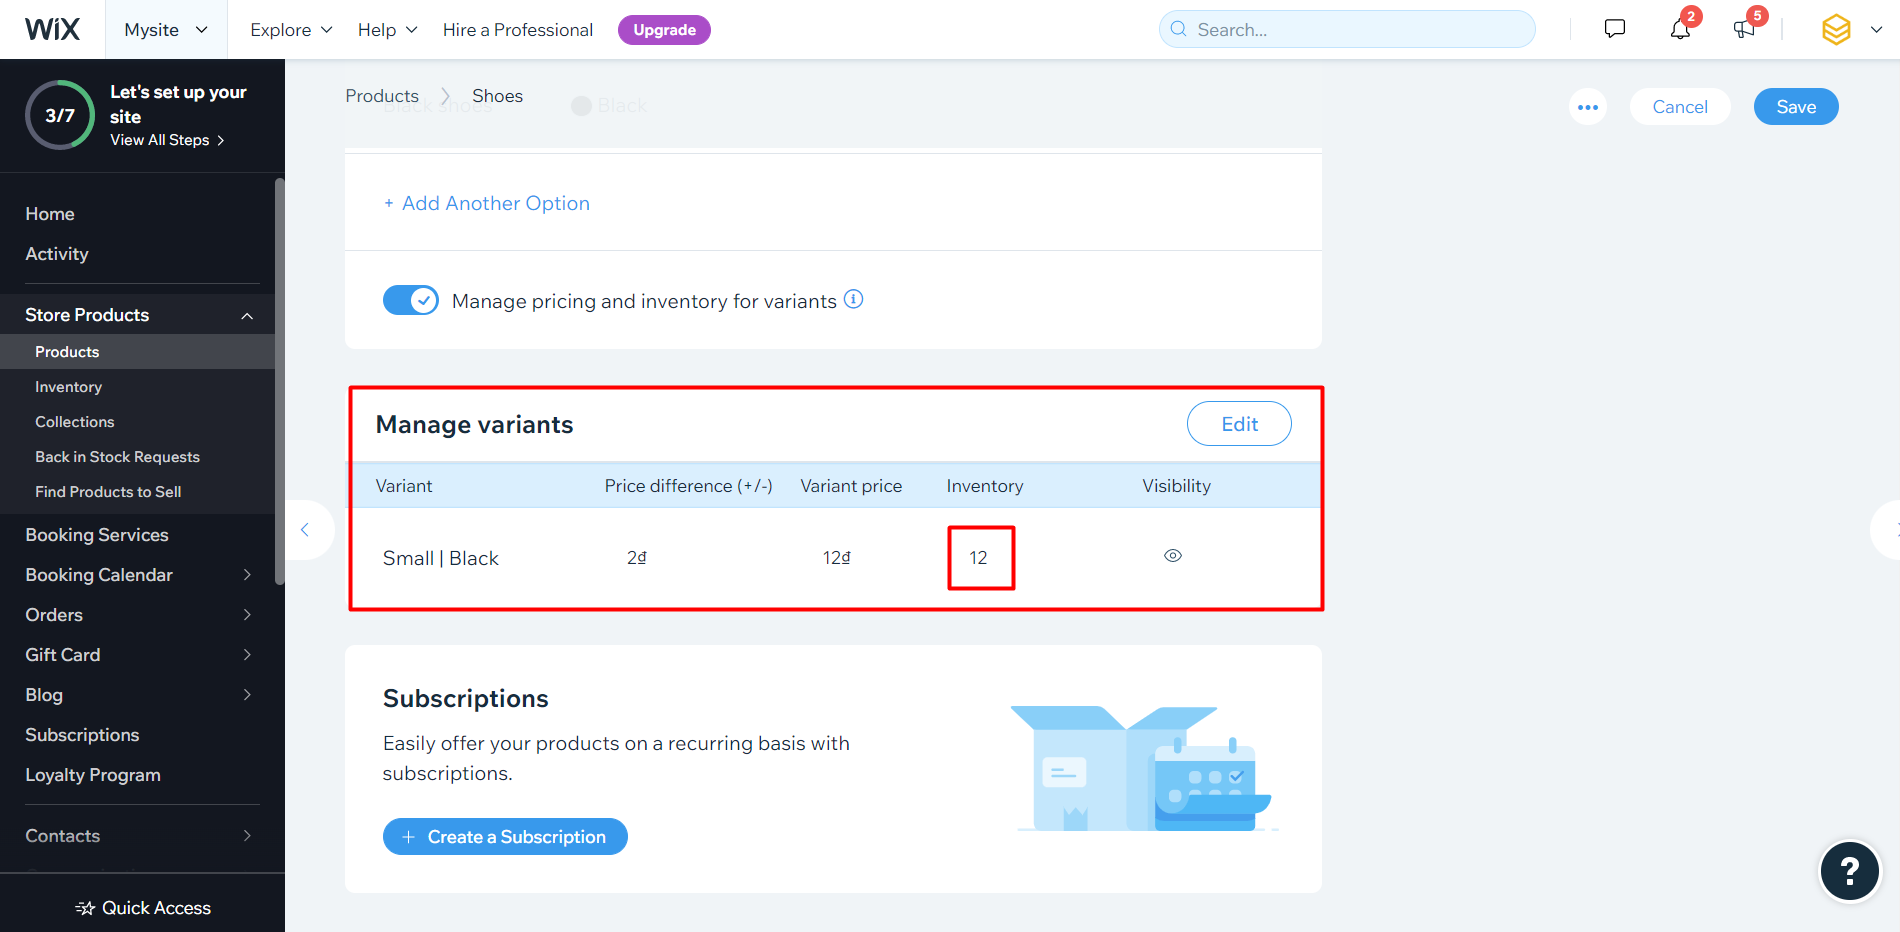
After increasing the inventory of the product variant, you can see the result in the Wix dashboard.
- From the Wix dashboard
- Go to the “Store products”
- and Choose “Products”
- Click on the product
- Scroll down to the “Manage variants” section.
As you can see, the quantity of Small Black has increased from 2 to 12.
Step 6: Decrease inventory using Postman
To decrease inventory, you can do the same with step 4. Remember to change the URL and payload:
URL:
https://www.wixapis.com/stores/v2/inventoryItems/decrementPayload:
{
    "decrementData": [{
        "productId": "<PRODUCT_ID>",
        "variantId": "<VARIANT_ID>",
        "decrementBy": 10
    }]
}
The above steps are to increase or decrease inventory using Postman with Wix API. The next article will explore Wix rest API and multiple ways to make API calls.
If you have any questions, let us know in the comment below or refer to our Wix API documentation.
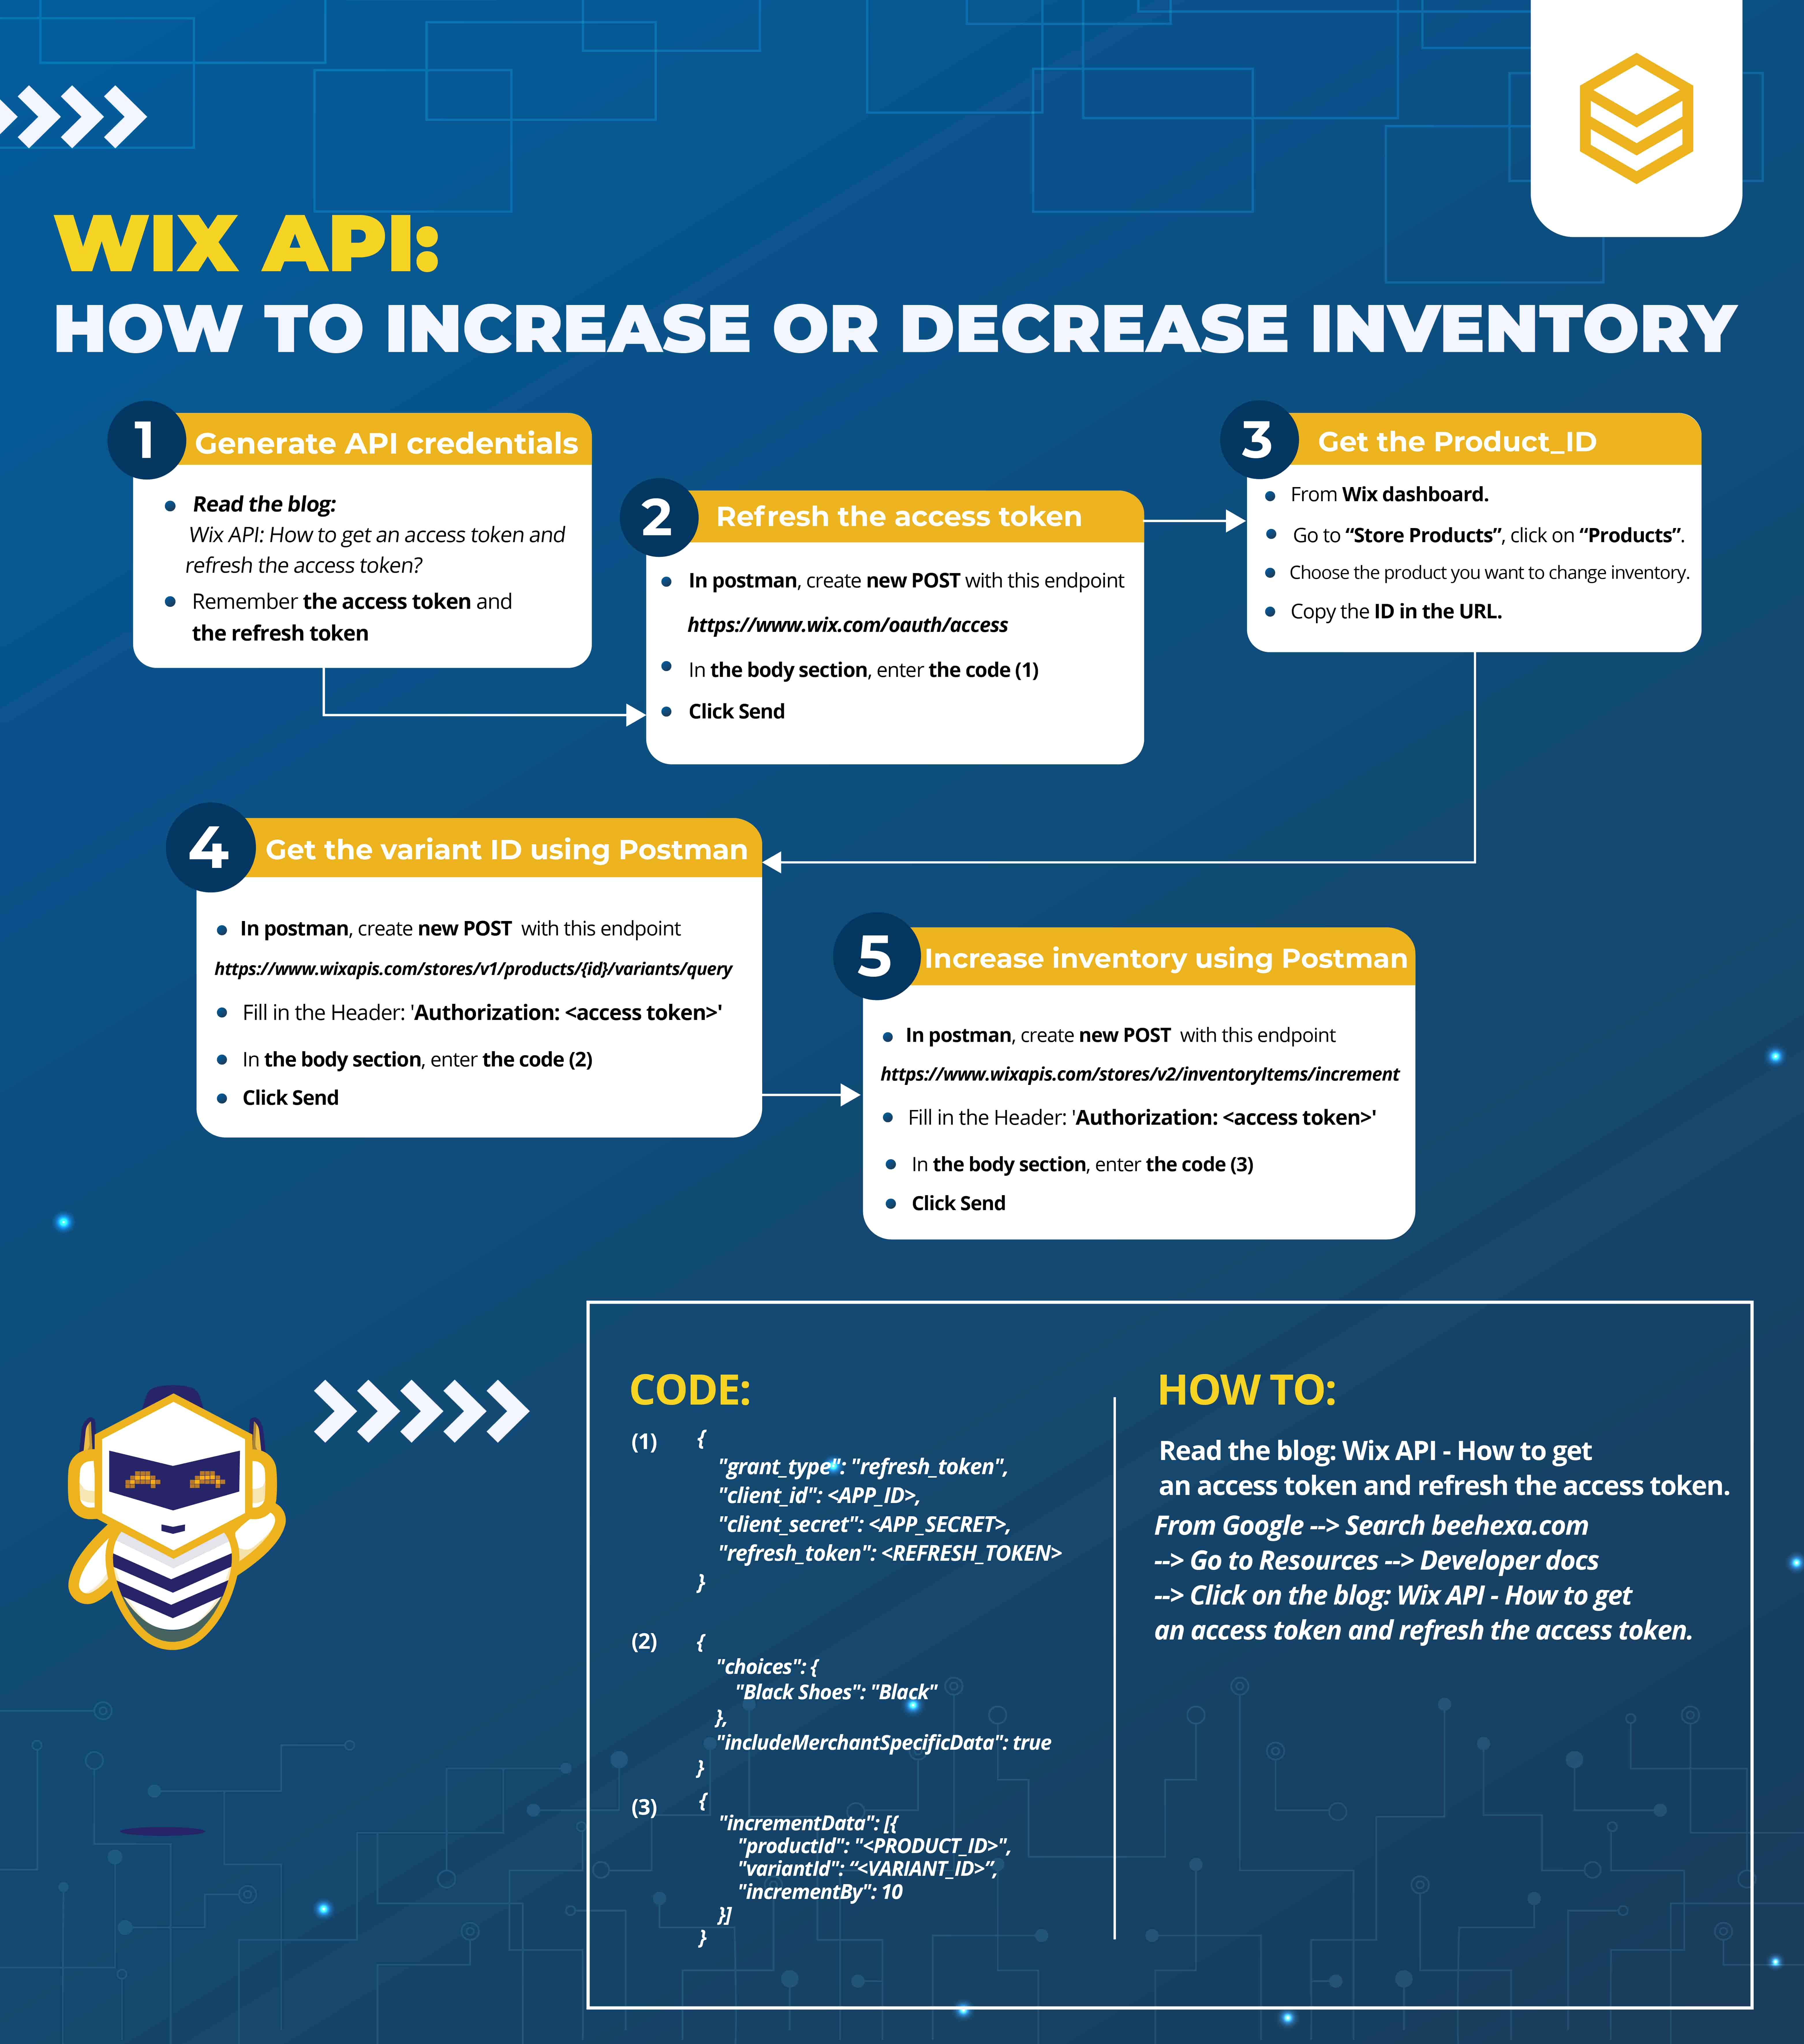
These steps will be shown visually in the infographic below.
Or you can watch this video for more overview.
Hopefully, you can do it!