You can use the Metafield resource to add extra information to other Admin API resources. Metafields can be used for various purposes, like adding a summary to a blog article. Metafields can also be used to share data with other Shopify apps. I will show you how to create metafield for a product with Shopify API using Postman.
Step 1: Generate API credentials from the Shopify admin
-
- Log in to your Shopify admin
-
- Go to Apps – Manage private apps

-
- Click Create a new private app
-
- In the App details section, enter a name for your app, and an emergency developer email.
-
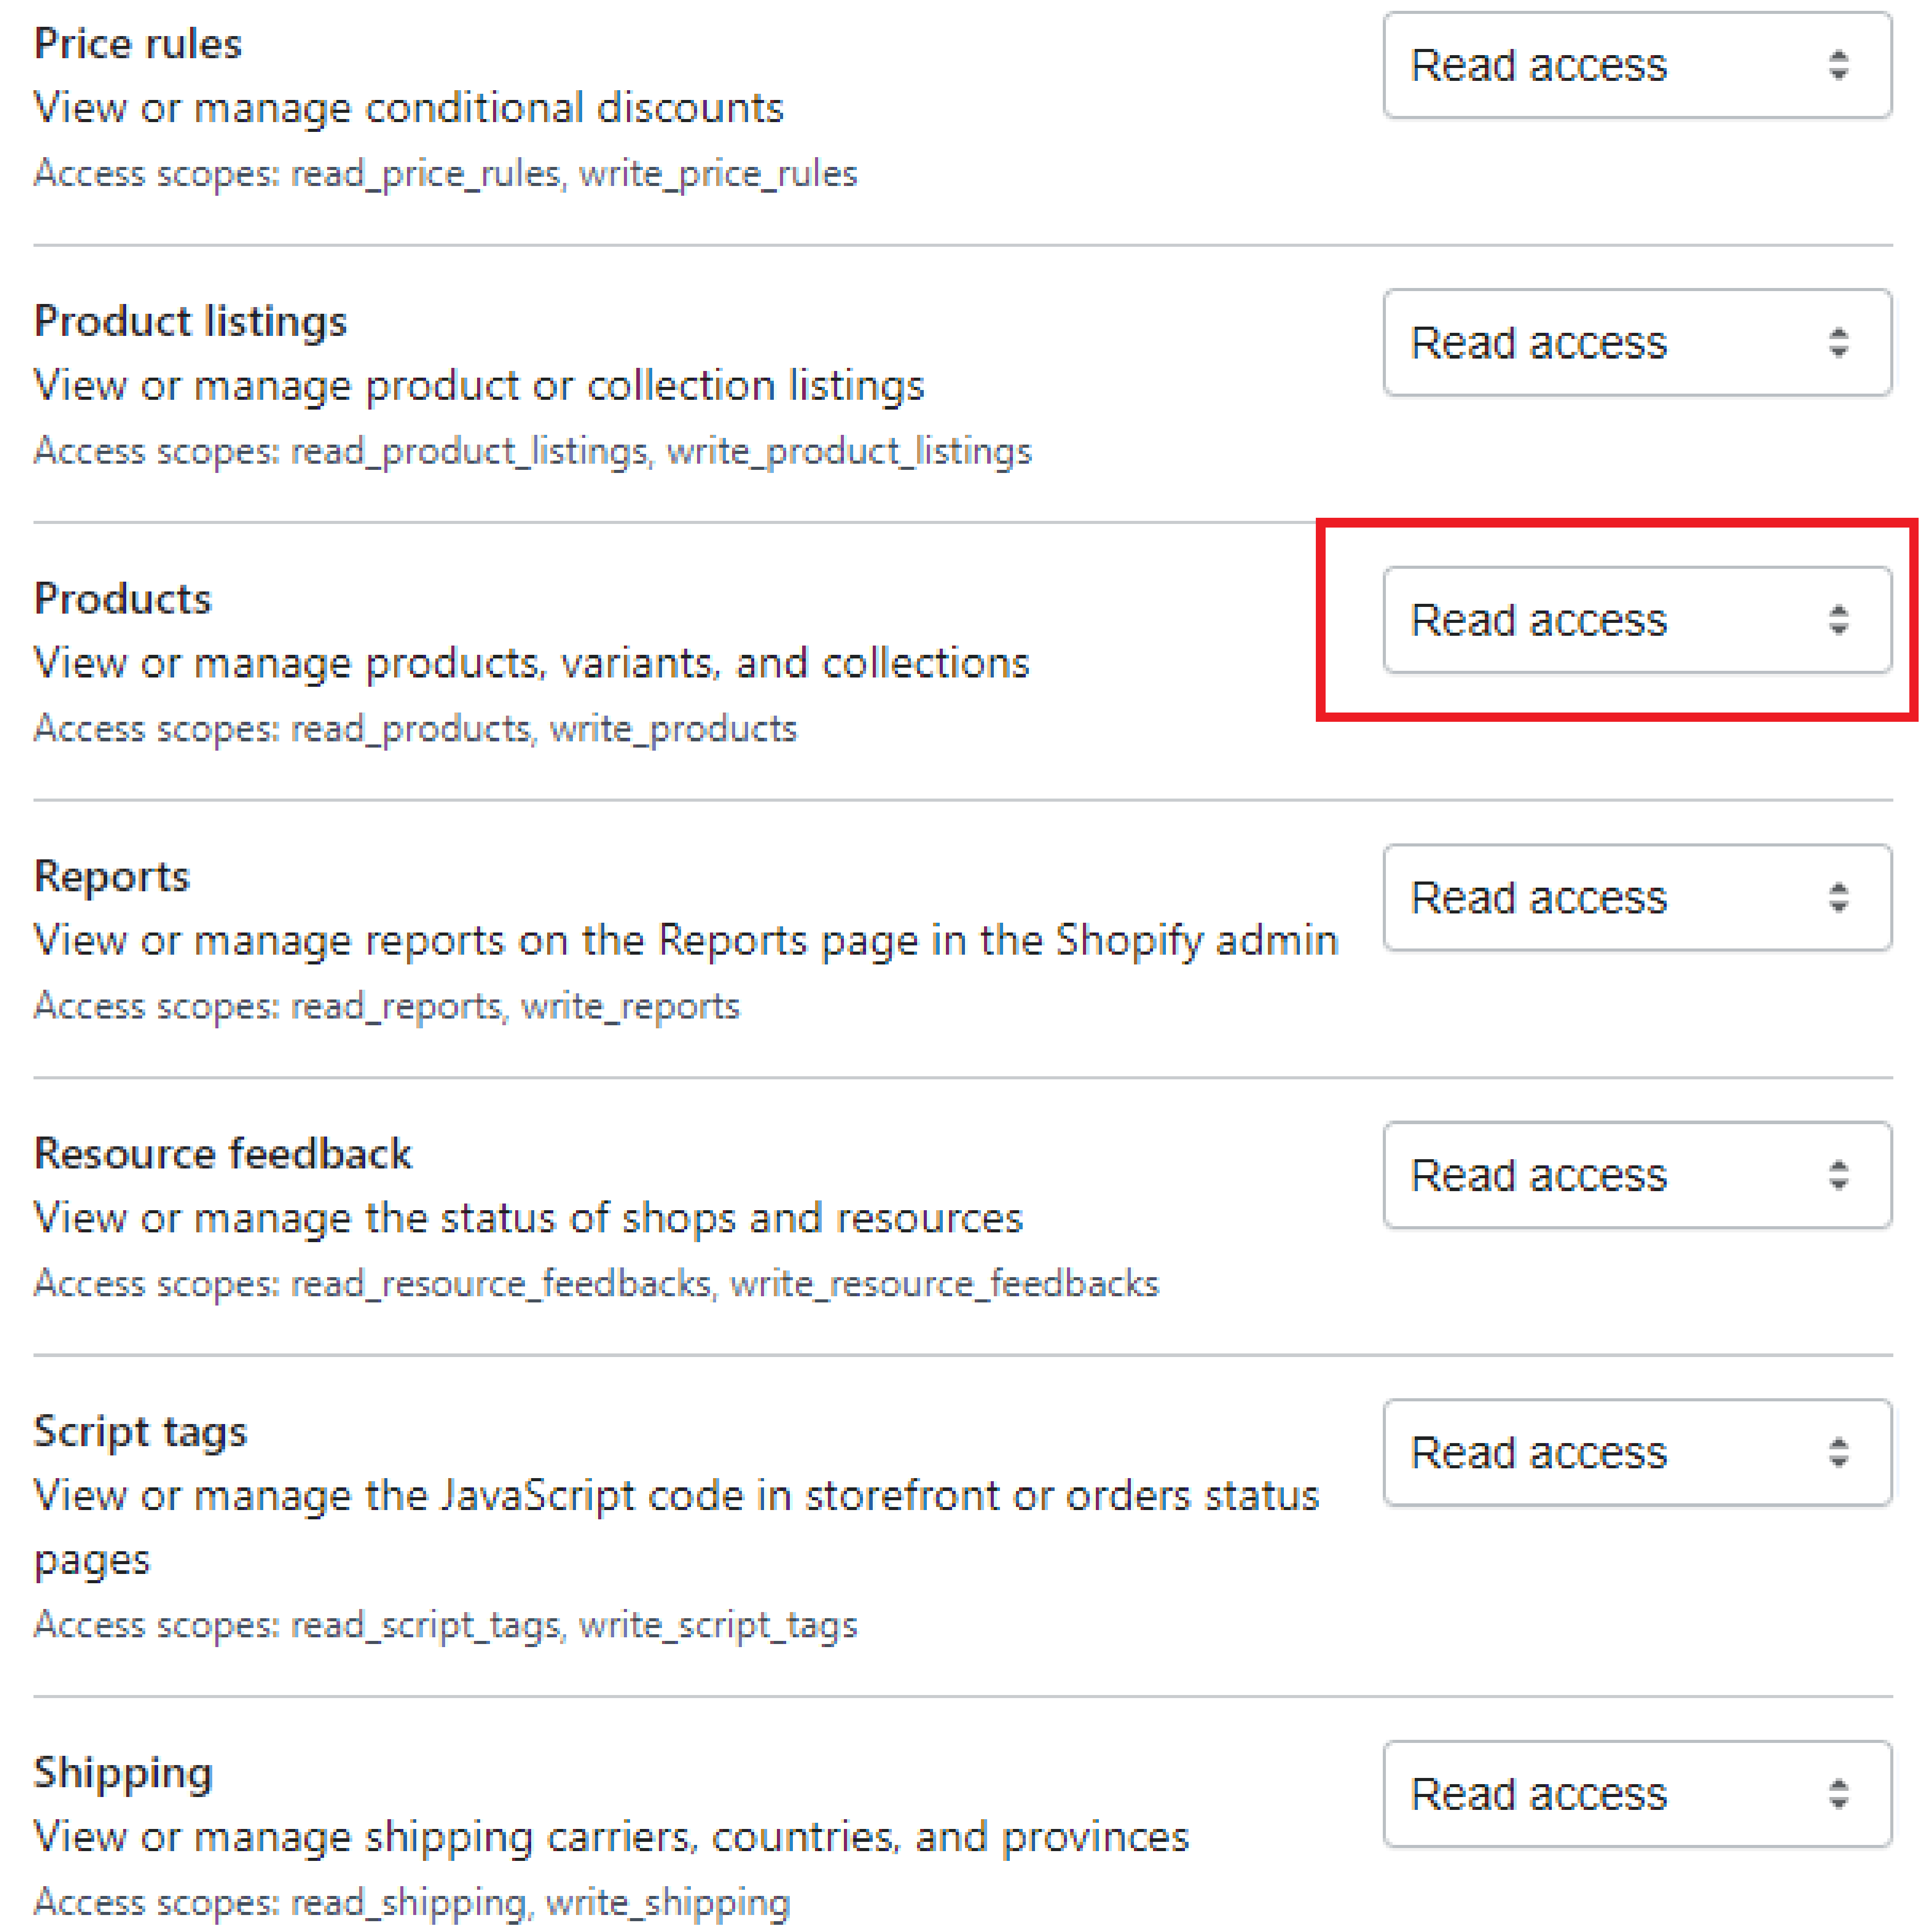
- In the Admin API section, select the areas of your store that you want the app to access

-
- Click Save
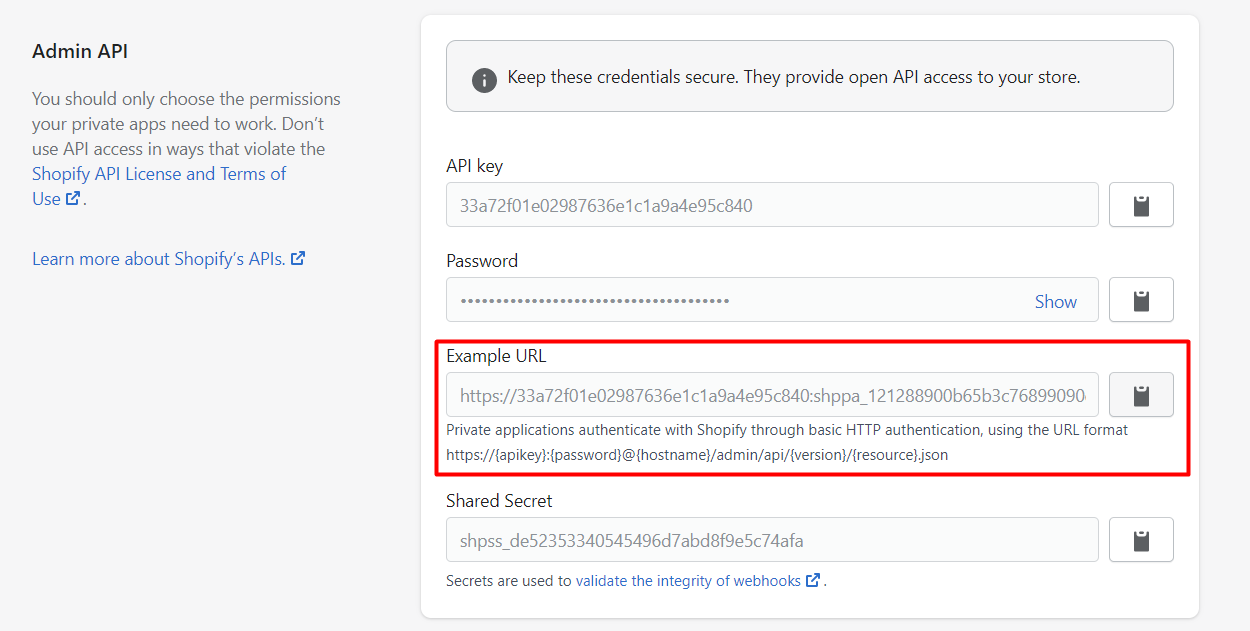
The Admin API section displays the app’s API key and password when you save the app’s details. In the next step, you’ll use these credentials to make authorized requests.
Step 2: Retrieve product id with Postman
You can use the API key and password you generated for your request’s basic HTTP authorization. The URL format for basic authorization is as follows:
https://{username}:{password}@{shop}.myshopify.com/admin/api/{api-version}/{resource}.json
-
{username}– The API key that you generated.
-
{password}– The API password that you generated.
-
{shop}– The name of your development store.
-
{api-version}– The supported API version that you want to use.
-
{resource}– A resource endpoint from the REST Admin API.
Or you can copy the Example URL in the Admin API section. Remember to change {resource} to products.
https://e175161fa050aa637380b9500e857ea0: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@hexasync.myshopify.com/admin/api/2021-07/products.json
-
- Log in to your Postman and create a new workspace
-
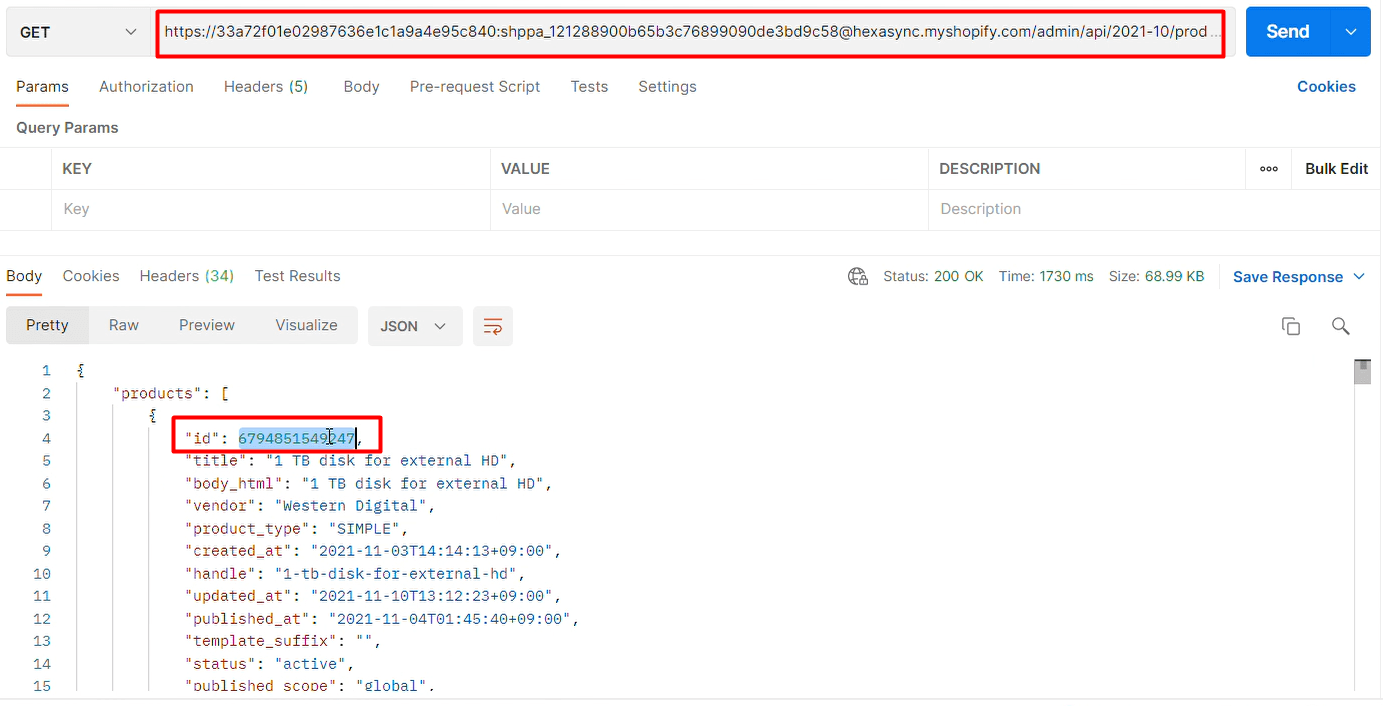
- Paste the URL above and click Get

-
- Find the product you want to create metafield and copy its ID
For example, my product id is 6794851549247
Step 3: Create metafield for a product with product id
- Open a new tab in Postman and change the URL with this Endpoint.
POST /products/#{id}/metafields.json |
For example, my URL:
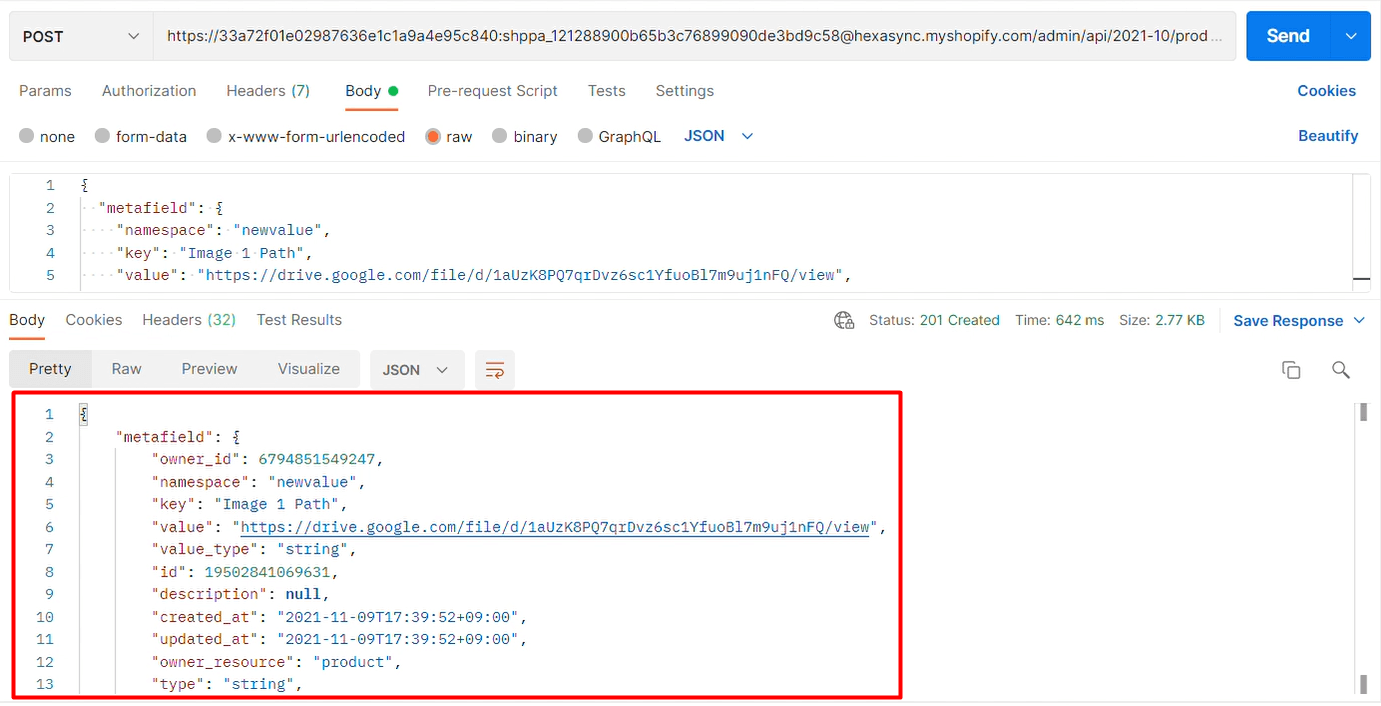
https://e175161fa050aa637380b9500e857ea0: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@hexasync.myshopify.com/admin/api/2021-07/products/6794851549247/metafields.json- In the Body section, click raw and choose JSON

- Enter this code
{
  "metafield": {
    "namespace": "newvalue",
    "key": "Image 1 Path",
    "value": "https://drive.google.com/file/d/1aUzK8PQ7qrDvz6sc1YfuoBl7m9uj1nFQ/view",
    "type": "string"
  }
}{namesapce}– A container for a set of metafields. You need to define a custom namespace for your metafields to distinguish them from the metafields used by other apps. Minimum length: 2 characters. Maximum length: 20 characters.{key}– The name of the metafield. Minimum length: 3 characters. Maximum length: 30 characters.{value}– The information to be stored as metadata.{type}– The metafield’s information type. See the full list of types.

- Click Send
Response
{
    "metafield": {
        "owner_id": 6794851549247,
        "namespace": "newvalue",
        "key": "Image 1 Path",
        "value": "https://drive.google.com/file/d/1aUzK8PQ7qrDvz6sc1YfuoBl7m9uj1nFQ/view",
        "value_type": "string",
        "id": 19502841069631,
        "description": null,
        "created_at": "2021-11-09T17:39:52+09:00",
        "updated_at": "2021-11-09T17:39:52+09:00",
        "owner_resource": "product",
        "type": "string",
        "admin_graphql_api_id": "gid://shopify/Metafield/19502841069631"
    }
}
The source of this metafield is an image I save on my Google drive. You can create as much as metafields as you want, change the {key} value.
I have just provided you with three steps to create Metafield using Shopify API. I hope it will be helpful for you when using the Shopify API. For more information, refer to our blog: What is an API?. Besides, you can see more Shopify API documentation in the developer docs.
If you don’t understand the tutorial’s content, you can watch this video for more overview.