In this post, I will show you how to create the personalization option for products using Magento 2 API.
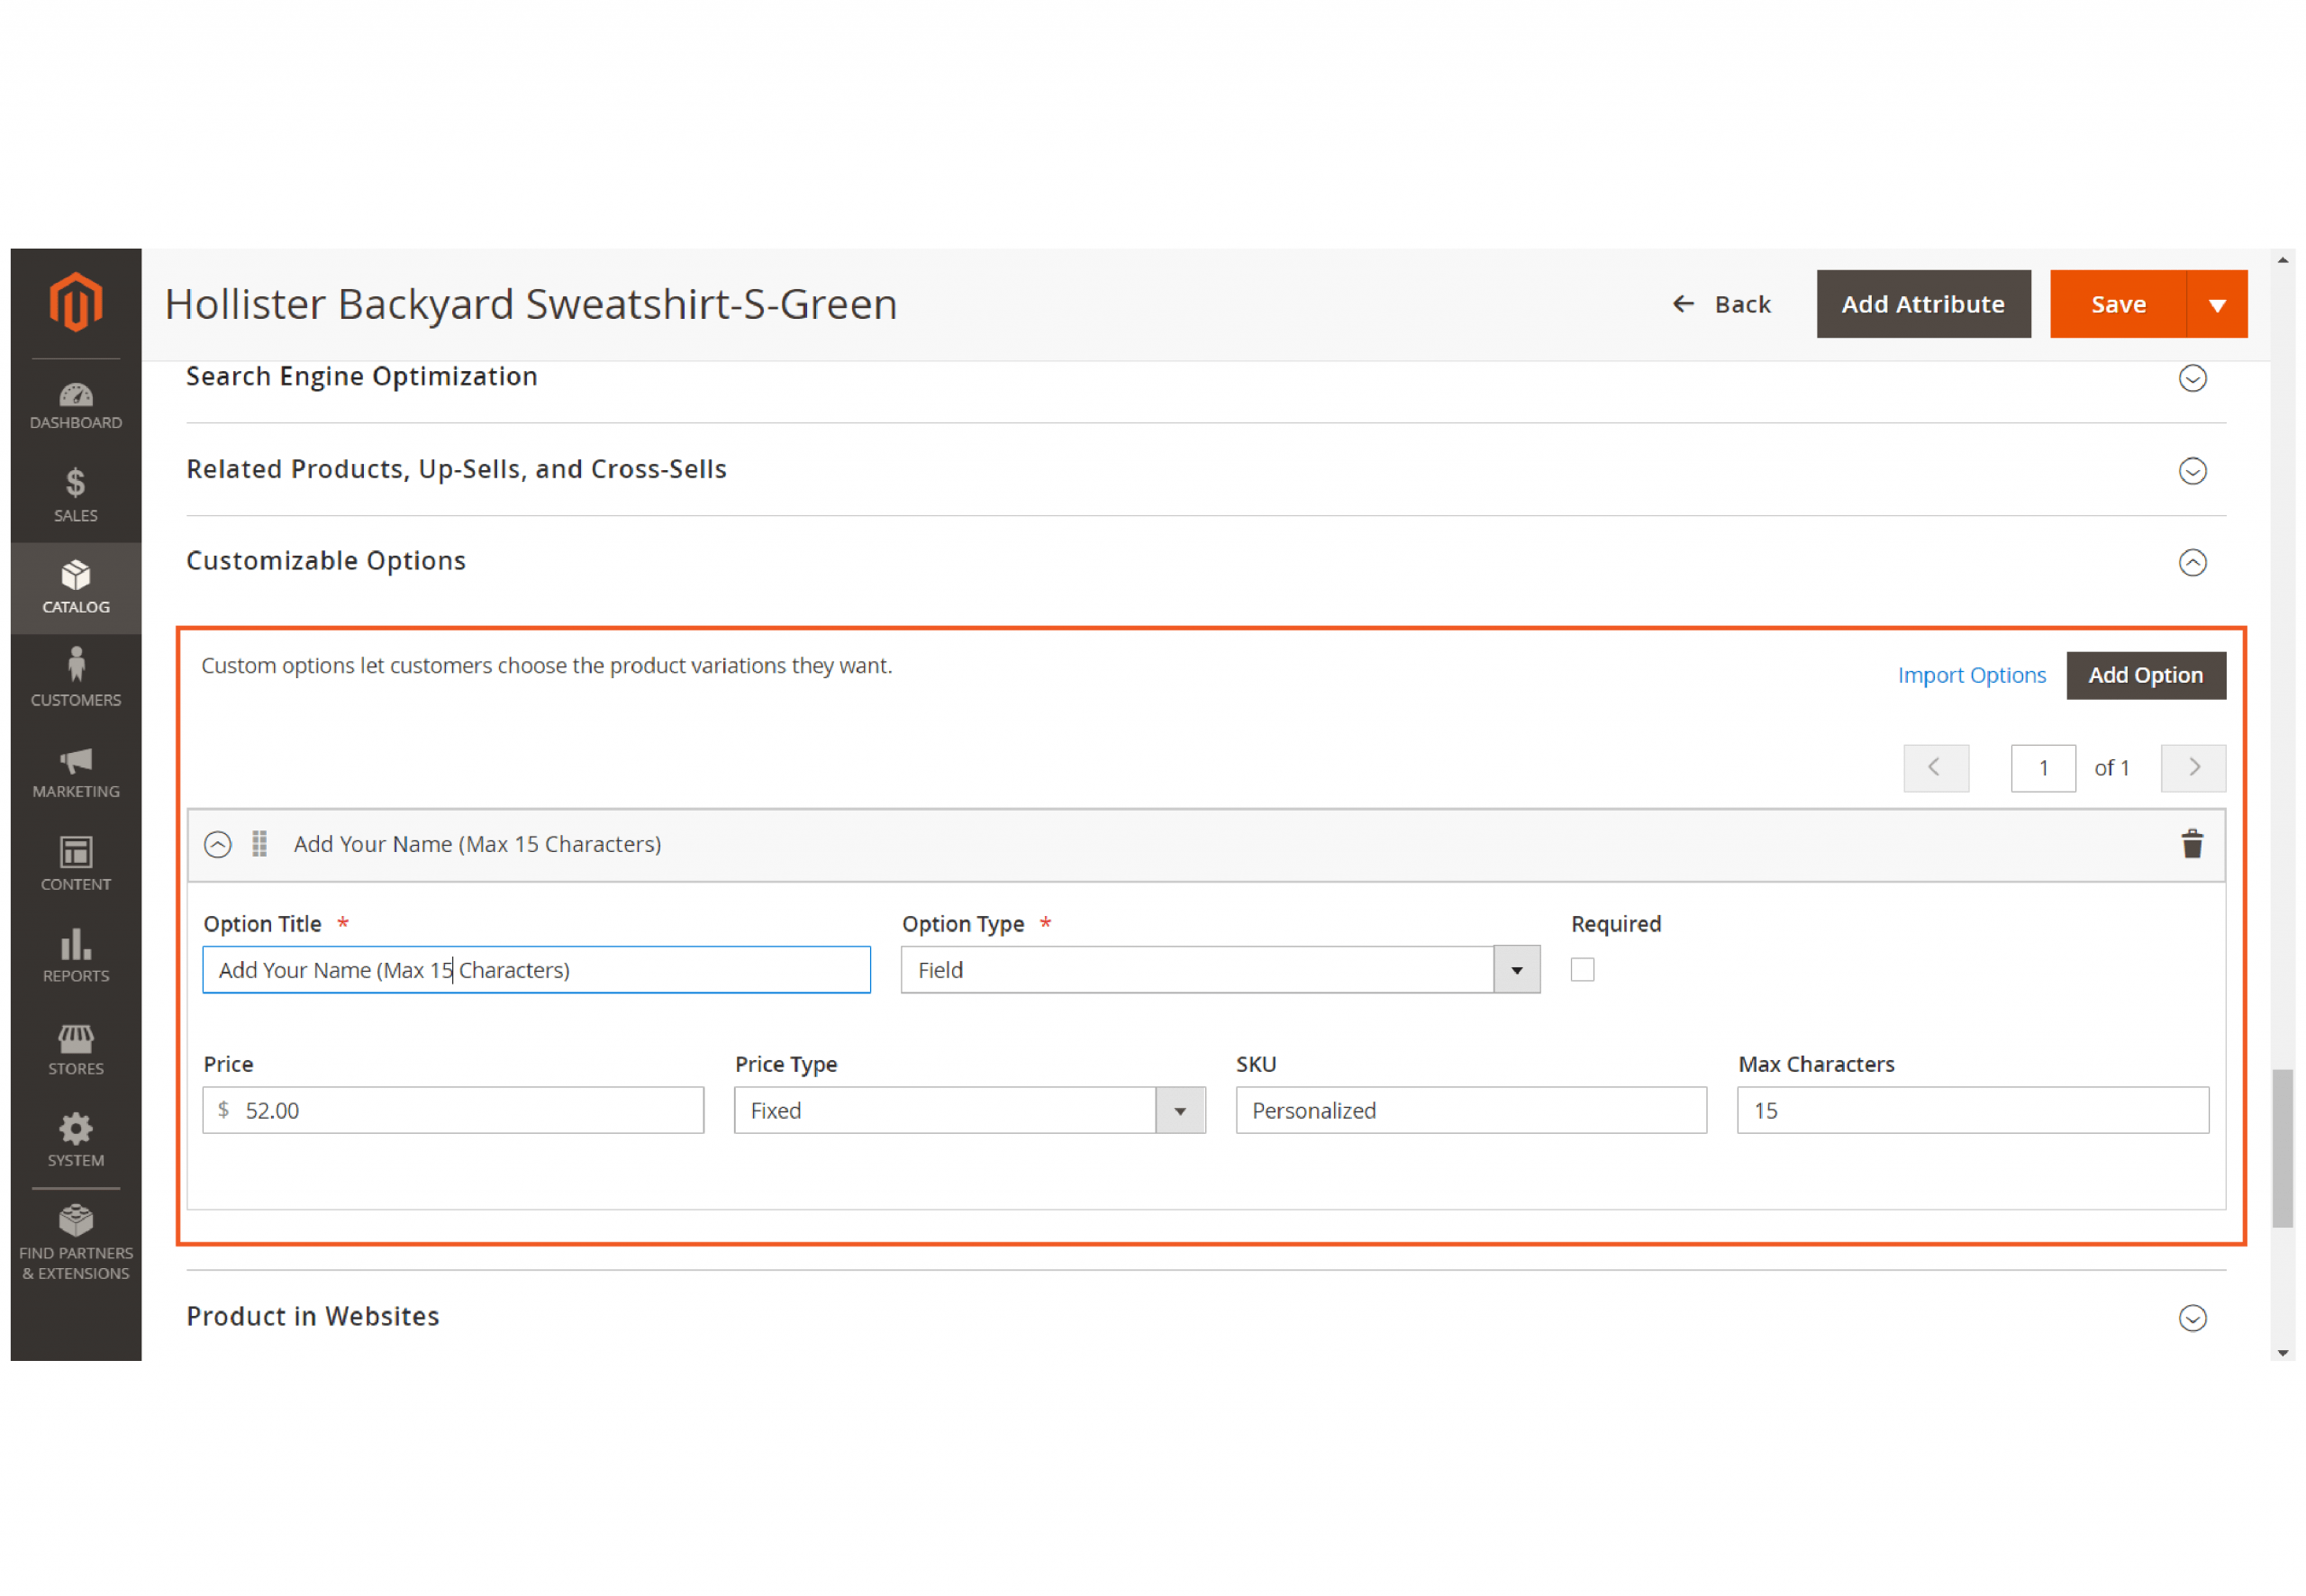
Let’s add a text box to the product page that allows the customer to add his name (up to 15 characters) to the back of the shirt.
Step 1: Generate Admin Access Token
Endpoint: POST <host>/rest/V1/integration/admin/token
Enter your admin username and password in the Body sections, then click Send.
{
  "username": "string",
  "password": "string"
}
Response: access token
Step 2: Create The Personalization Option
Create a new request and enter the admin access token
Authorization: Bearer token
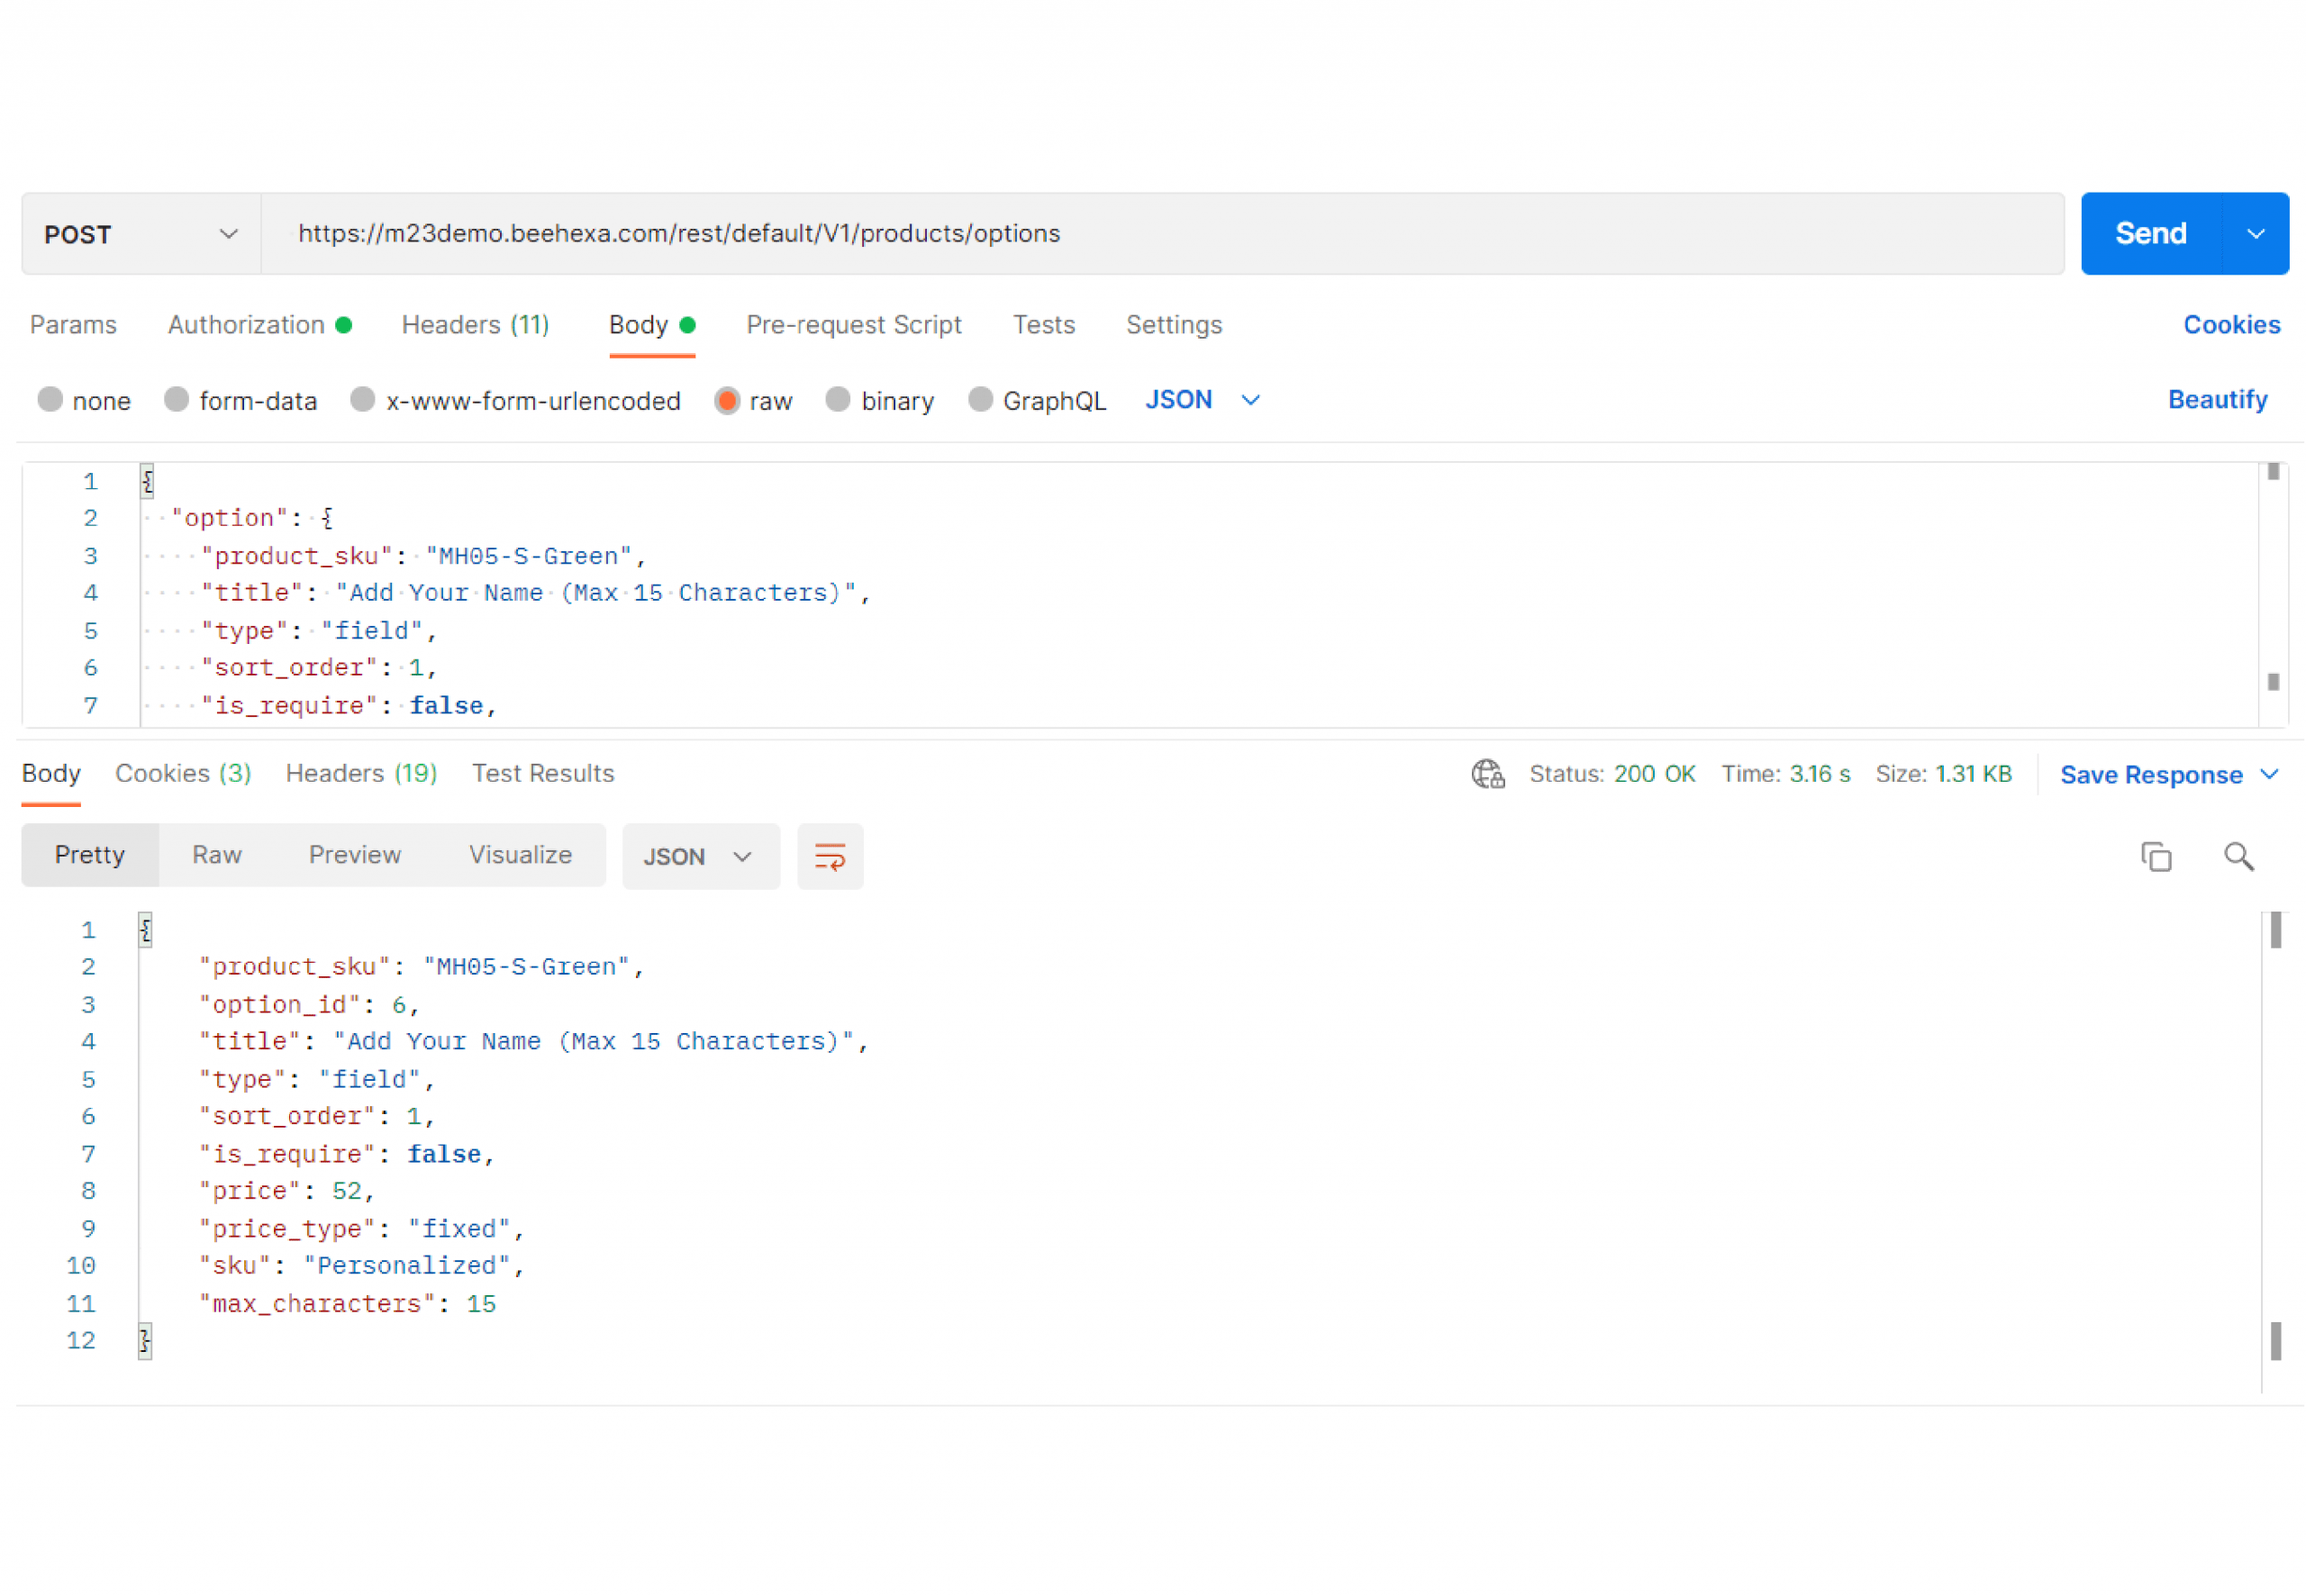
Endpoint: POST <host>/rest/default/V1/products/options
Payload:
{
  "option": {
    "product_sku": "MH05-S-Green",
    "title": "Add Your Name (Max 15 Characters)",
    "type": "field",
    "sort_order": 1,
    "is_require": false,
    "price": 52,
    "price_type": "fixed",
    "sku": "Personalized",
    "max_characters": 15
  }
}
API will return a response that has data like this:
{
    "product_sku": "MH05-S-Green",
    "Option_id": 6,
    "title": "Add Your Name (Max 15 Characters)",
    "type": "field",
    "sort_order": 1,
    "is_require": false,
    "price": 52,
    "price_type": "fixed",
    "sku": "Personalized",
    "max_characters": 15
}
Step 3: Verify the personalization option
Log in to admin and select Catalog > Products. Click on the Hollister Backyard Sweatshirt simple product and expand the Customizable Options section.

In this way, you can create the personalization option using Magento API. For more information, please refer to Magento DevDocs. If you have any questions or new ideas, feel free to leave a comment below.