Cloudflare Tunnel Configuration
Go to Cloudflare Dashboard → Networking → Tunnels → Create Tunnel → Cloudflared.
- Set the Tunnel name
- Set the Tunnel environment
- Operating System : Window or Linux/Debian
- Architecture: 64-bit
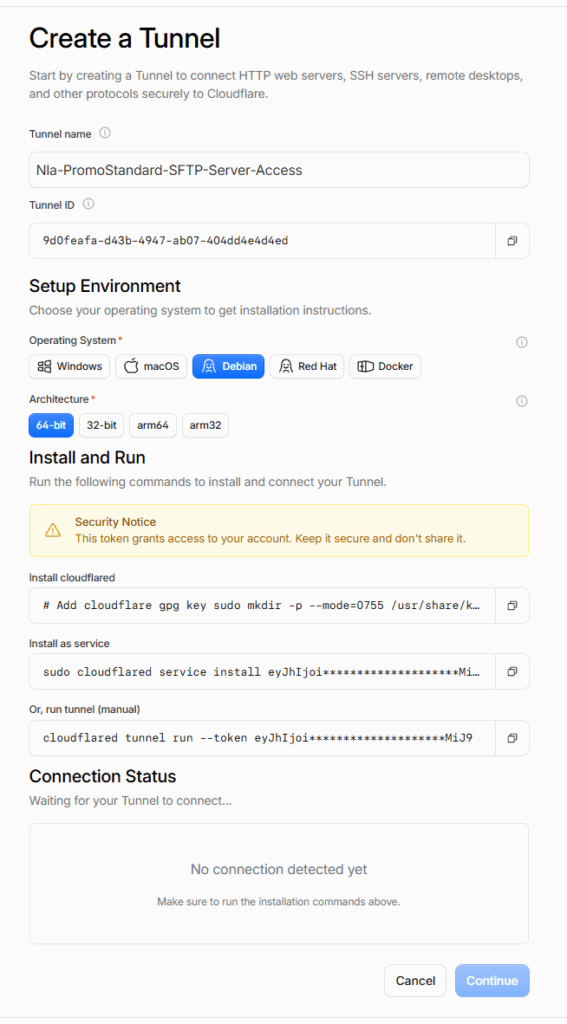
With Linux, cloudflare will generate an installation command similar to:
sudo cloudflared service install <TUNNEL_TOKEN>Install cloudflared and run this command on the Linux SFTP Server.
Verify that the Tunnel status becomes HEALTHY.
Cloudflare Access Configuration
Create Published Application
Go to Networking → Tunnels → nla-sftp-tunnel → Routes → Add route → Published application.
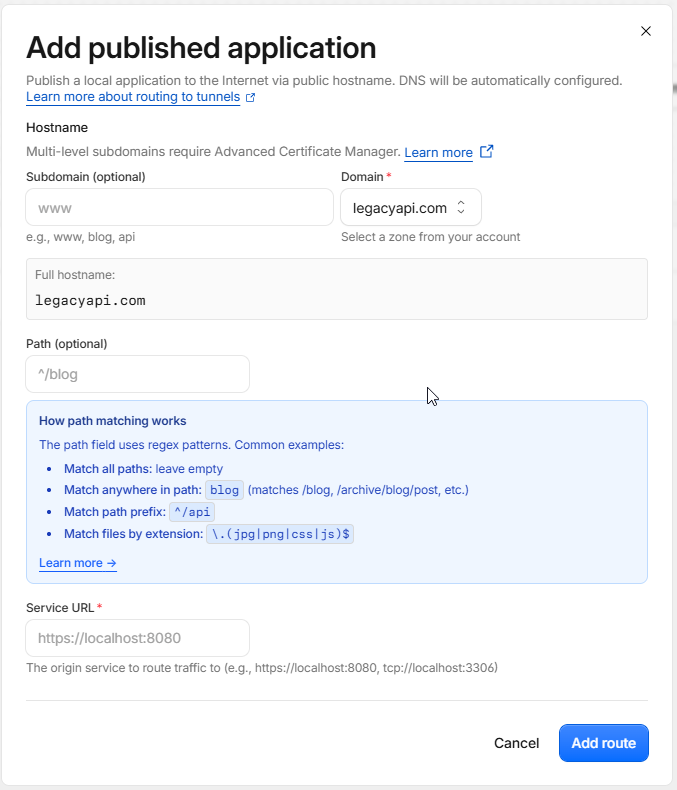
Configure:
Hostname: <your-full-hostname>
Service: SSH
URL: localhost:22Equivalent service URL:
ssh://localhost:22Create Cloudflare Access Application
Go to Zero Trust → Access controls → Applications → Add an application → Self-hosted.
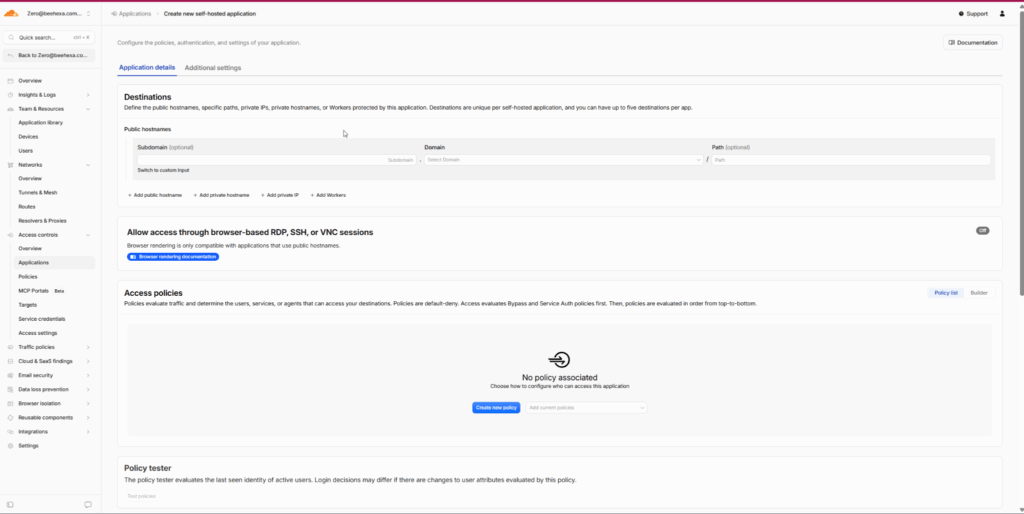
Configure:
Application Name: NLA SFTP Access
Domain: <your_domain>Access Policy Configuration
In this Cloudflare Access Application, create two policies to support both Email OTP access and Service Token access.
Allow Access by Email
Create Policy
Create an Allow policy for authorized users only.
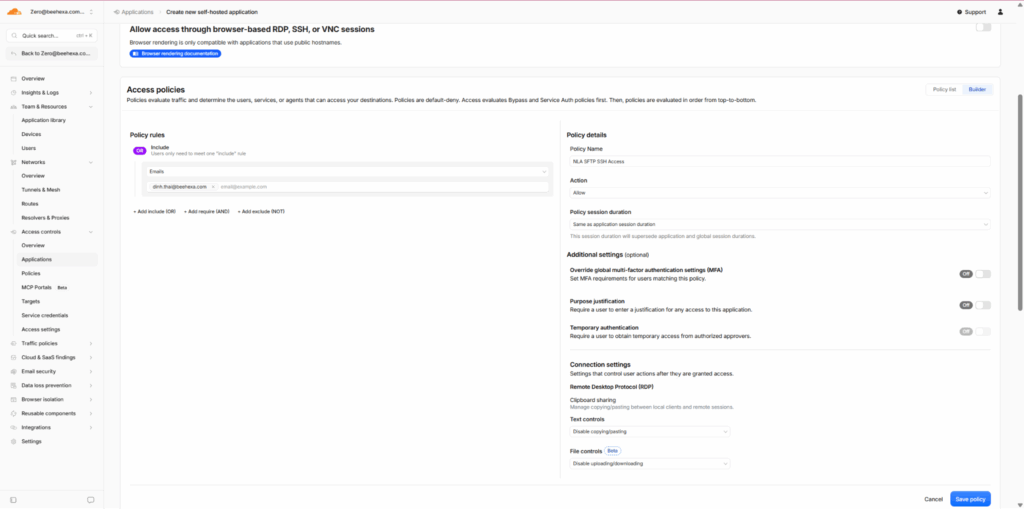
Example:
Policy Name: Allow Beehexa SFTP Access
Action: AllowAllow specific users:
team@beehexa.com
dinh.thai@beehexa.comUsing specific accounts is recommended instead of allowing the entire email domain.
Configure One-Time PIN
Back to your Cloudflare Access Application, at Authentication > Choose available identity providers for this application > Select onetimepin

One-Time PIN determines how the user authenticates.
The Access Policy determines who is allowed to connect.
Allow Access by Service Token
Create Service Token
First, in Cloudflare Zero Trust, create a Service Token for automated server-to-server access.
Go to: Zero Trust > Access controls > Service credentials > Service Tokens
Click Create Service Token.
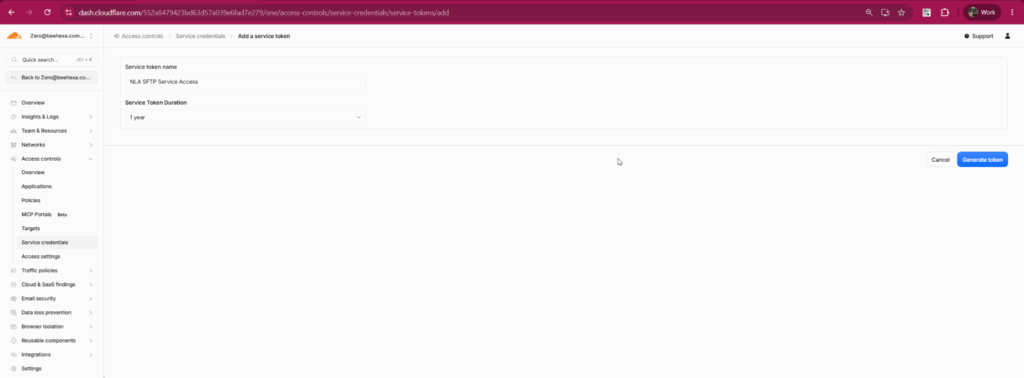
Example:
Service Token Name: Beehexa SFTP Service
Duration: 1 yearAfter creating the token, Cloudflare will provide:
Client ID
Client SecretSave both values securely.
The Client Secret is only displayed when the token is created. Make sure to copy and save it before closing the page.
Then go back to your Cloudflare Access Application and create a policy:
Create Policy
Create another policy for server-to-server access.
Example:
Policy Name: Allow Beehexa SFTP Service
Action: Service Auth
Under Include, select:
Service Token
> Service Token created in the previous step The Service Token allows automated services to access the SFTP server without requiring Email OTP or browser login.